Category

Exercises

Category
This post contains affiliate links, meaning that I may receive compensation if you make a purchase through these links. As an Amazon Associate, I earn from qualifying purchases. This compensation does not influence the content, or recommendations provided. The opinions expressed are my own, and I strive to provide honest and unbiased information.


Full Body vs. Targeted Exercise: A Guide to Getting Fit

Are you ready to transform your fitness routine but unsure whether to choose full body exercises or targeted workouts? You’re not alone! Picking the right approach can make a huge difference in achieving your fitness goals. Whether you’re aiming to lose weight, build strength, or improve overall health, this guide will break it all down for you. We’ll compare full body versus targeted exercises, discuss the best tools to make your workouts even more effective, and highlight some trending fitness products you’ll want to grab today. Let’s dive in!

What’s the Difference? Full Body vs. Targeted Exercise

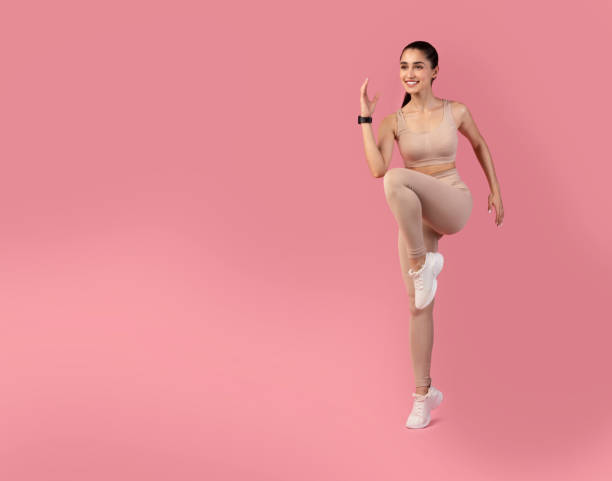
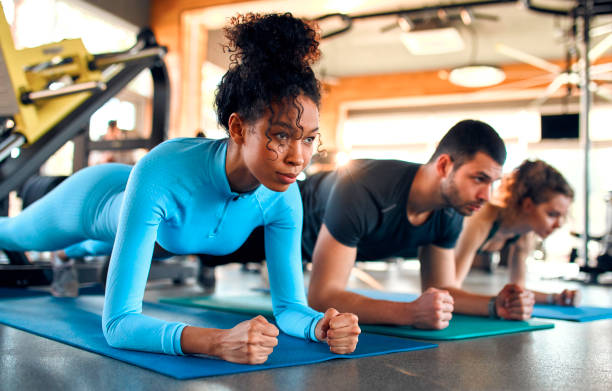
The biggest question for most beginners is: should I focus on my entire body or work on specific areas? Full body exercises involve movements that engage multiple muscle groups at the same time. Think of squats, burpees, or push-ups—they get your heart pumping while toning different parts of your body simultaneously.

On the other hand, targeted exercises isolate specific muscles or areas. For example, bicep curls focus only on your arms, while leg presses zero in on your lower body. Both methods are effective, but which one you choose depends on your fitness goals.

For people looking for quick results, full body workouts are often the better choice. They burn more calories, save time, and improve coordination. However, targeted exercises are perfect if you’re trying to shape specific areas, like toning your abs or sculpting your arms.

Benefits of Full Body Workouts

Full body workouts are all the rage, and for good reason! They’re efficient and can fit into any busy schedule. Here are some key benefits:

1. Burns More Calories: When you engage multiple muscle groups, your body works harder, torching more calories in less time.
2. Boosts Heart Health: Many full body exercises double as cardio, improving your cardiovascular system.
3. Builds Functional Strength: Movements like lunges and deadlifts mimic real-life activities, helping you perform daily tasks better.
4. Saves Time: You can complete a full body workout in 20–30 minutes, making it perfect for busy people.

Trending products to enhance your full body workouts include resistance bands, weighted jump ropes, and adjustable dumbbells. These tools add variety and challenge to your routine, helping you reach your goals faster.

Why Choose Targeted Exercises?

Close up Photo of 3 Persons performing the Plank Exercise
Target Specific Exercises Like the plank focus on the Abs

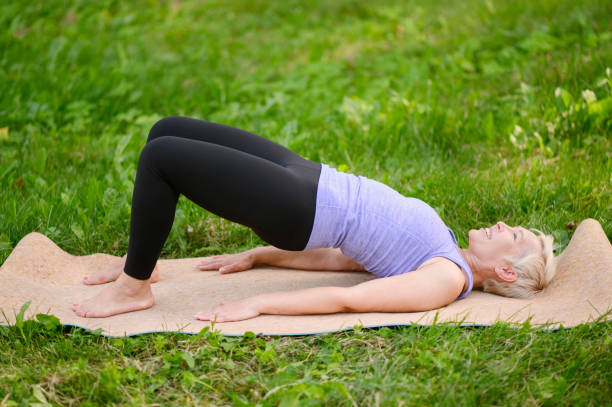
Sometimes, you just want to focus on one area of your body. That’s where targeted exercises shine! These workouts let you focus on specific muscles to improve their size, strength, or endurance.

For instance, if you dream of chiseled abs, planks and Russian twists are your go-to. Want killer legs? Leg extensions and calf raises are perfect. Targeted exercises are also great for injury recovery or muscle imbalances, as they allow you to strengthen weak areas without overloading others.

To amplify your targeted exercises, consider equipment like ankle weights, resistance loops, or ab rollers. These tools help you isolate muscles more effectively and make your workouts more exciting.

Full Body vs. Targeted Exercise: Which Is Right for You?

Here’s a secret: you don’t have to choose one over the other. Mixing full body and targeted exercises often gives the best results. For example, you can start your week with a full body workout to boost calorie burn and end with targeted exercises to fine-tune specific muscles.

Beginners might want to lean more towards full body routines. They’re simpler to learn and provide a solid foundation. As you progress, adding targeted exercises helps balance your routine and prevent plateaus.

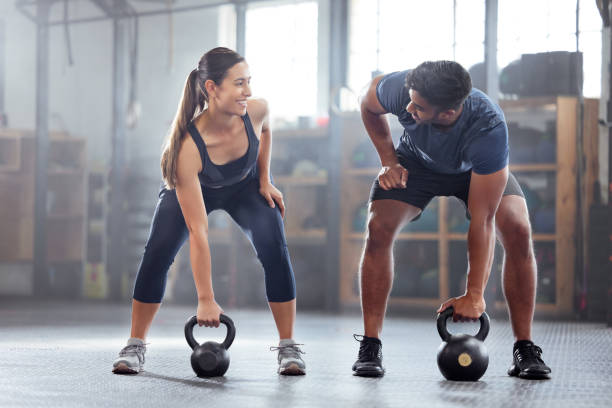
If you’re still unsure, try experimenting with popular full body movements like kettlebell swings and deadlifts, then balance them out with targeted moves like triceps dips or shoulder presses.

Must-Have Fitness Products for Your Workouts

Photo of a Woman and Man Using Kettlebells at the Gym
Fitness products like Kettlebells focus on the Whole Body

Looking to upgrade your fitness routine? Check out these trending products that are a hit among fitness enthusiasts:

1. Adjustable Kettlebells: Great for full body movements like swings and squats. They’re compact and versatile.
2. Ab Roller Wheel: Perfect for sculpting a strong core and improving balance.
3. Weighted Hula Hoops: Make your workouts fun while toning your waist and improving flexibility.
4. Push-Up Bars: Take your push-ups to the next level with better grip and form.
5. Foldable Yoga Mats: Lightweight and durable, these mats are essential for both full body and targeted exercises.
6. Ankle Weights: Add resistance to leg lifts, kickbacks, and more.
7. Compact Ellipticals: Perfect for low-impact cardio sessions at home.

Each of these tools complements your workout, making exercises more enjoyable and effective. Plus, they’re easy to store, which is perfect for small spaces.

Tips for Staying Motivated

Staying consistent with your fitness routine can be tough, but these tips will keep you on track:

Set Clear Goals: Decide what you want—weight loss, strength, or endurance. This helps you focus.
Track Progress: Use a fitness tracker or app to measure improvements.
Switch Things Up: Alternate between full body and targeted exercises to keep boredom away.
Reward Yourself: Celebrate milestones with a new piece of gear or outfit.
Join a community: Online workout groups can boost accountability and motivation.

Final Thoughts: Full Body vs. Targeted Exercise

When it comes to full body vs. targeted exercise, there’s no one-size-fits-all answer. Full body workouts are great for efficiency and calorie burn, while targeted exercises let you focus on specific areas. The best approach is to combine both, tailoring your routine to match your fitness goals.

Don’t forget to invest in high-quality gear to elevate your workouts. Whether it’s a kettlebell for full body moves or an ab roller for core isolation, having the right tools can make all the difference. So, what are you waiting for? Start your fitness journey today and discover the amazing benefits of both full body and targeted exercises!


This post contains affiliate links, meaning that I may receive compensation if you make a purchase through these links. As an Amazon Associate, I earn from qualifying purchases. This compensation does not influence the content, or recommendations provided. The opinions expressed are my own, and I strive to provide honest and unbiased information.


Exercise and Skin Issues: Understanding Causes and Solutions

Engaging in regular exercise is fantastic for overall health, but it can also sometimes lead to unexpected skin issues. While exercise boosts your circulation, enhances your mood, and promotes physical fitness, it can also expose your skin to conditions that trigger breakouts, rashes, and other irritations. By understanding why these skin problems arise and using some effective skincare strategies, you can prevent and reduce the impact of exercise on your skin.

Common Skin Issues Caused by Exercise

Exercise exposes your skin to a unique set of conditions. Let’s take a closer look at the most common skin issues caused by exercise and how you can address them.

1. Acne Breakouts

Photo of a Woman with Skin Irritation on Her Back
Tight Clothes and Exercise Can Cause Skin Irritation

When you work up a sweat, your skin pores open up to release heat, which can become a problem if the pores get clogged with dirt or bacteria. Sweat itself doesn’t cause acne, but when it mixes with oils and dead skin cells, it creates a perfect environment for breakouts. Tight workout clothing can also trap sweat and oil against your skin, especially on your back and shoulders, where back acne is common.

To help prevent these types of breakouts, use a non-comedogenic body wash and choose a cleanser that contains ingredients like salicylic acid to help remove excess oils. Products with benzoyl peroxide are also helpful for targeting acne caused by sweat and bacteria.

2. Skin Chafing and Friction Burns

When skin repeatedly rubs against itself or tight clothing, it can lead to painful chafing. This is especially common in areas like the inner thighs, underarms, and around sports bra straps. Friction combined with sweat can irritate the skin further, causing red, raw patches or even rashes.

To prevent chafing, consider using an anti-chafing balm that can act as a barrier to protect the skin.  Additionally, wearing moisture-wicking, breathable clothing can help reduce sweat buildup and minimize friction.

3. Heat Rash (Prickly Heat)

Heat rash, also known as prickly heat, occurs when sweat gets trapped under the skin, leading to small, itchy red bumps. This is often seen in hot and humid weather and typically affects areas where sweat glands become blocked, such as the neck, chest, and back.

Cooling down promptly after exercising can help avoid this issue. Use a cooling body spray or antiperspirant powder in areas where heat rash tends to appear.

Common Skin Issues Caused by Exercise (Additional)

4. Fungal Infections

Close-up Photo of a Man Scratching His Feet Post Exercise
Athlete’s Foot Can Be Prevented with Good Hygiene

Gyms are prime locations for fungal infections to thrive. Skin issues like athlete’s foot, jock itch, and ringworm can spread through contact with gym equipment, locker rooms, and sweaty clothing. These infections cause itching, redness, and discomfort, making it crucial to practice good hygiene and take preventive measures.

To prevent fungal infections, keep skin dry and change out of sweaty clothes as soon as possible. Use an antifungal powder or medicated spray on areas prone to fungal growth. If you suspect a fungal infection, look for antifungal creams or powders with active ingredients like miconazole or clotrimazole.

5. Contact Dermatitis from Workout Equipment

Contact dermatitis is a skin reaction that can occur when skin comes into contact with certain materials. Gym equipment like yoga mats, weights, and machine handles may contain latex, rubber, or certain metals that can irritate sensitive skin, leading to red, itchy patches.

Using personal protective gear can help avoid these reactions. Wear protective gloves when lifting weights. Use a hypoallergenic mat if you’re practicing yoga or floor exercises.

Tips to Prevent and Manage Skin Issues Caused by Exercise

Implementing a few skincare practices before, during, and after exercise can significantly reduce the risk of skin problems.

1. Cleanse Before and After Exercise

Starting your workout with clean skin helps reduce the chance of clogging your pores with dirt and oil. Cleanse your face and any exposed skin with a gentle, pH-balanced cleanser before exercising. Post-workout, wash off sweat and grime with a mild body wash to help prevent acne and irritation

2. Use Oil-Free Skincare Products

If you’re prone to acne or oily skin, switch to oil-free or non-comedogenic products. These products are less likely to clog pores, reducing the risk of post-workout breakouts. Look for moisturizers that contain hyaluronic acid to help hydrate without adding excess oil.

3. Avoid Heavy Makeup During Exercise

Heavy makeup can block pores and trap sweat, leading to increased acne risk. If you prefer a bit of coverage, consider lightweight, breathable formulas or tinted moisturizers specifically designed for sports activities.

4. Keep a Cooling Mist Handy

Sweating is unavoidable during exercise, especially in warm environments. A cooling facial mist can provide instant refreshment and reduce redness. Look for ingredients like green tea or cucumber extract to soothe and hydrate your skin without clogging your pores.

5. Change Out of Sweaty Clothes Quickly

Sweat-soaked clothing can irritate the skin, trapping bacteria and oils that increase the chance of breakouts and infections. After a workout, try to shower or change out of your workout attire as soon as possible. Look for moisture-wicking clothing that reduces sweat accumulation and promotes better airflow.

6. Stay Hydrated

Dehydration affects your skin’s health, making it more prone to dryness and irritation. Drinking enough water before, during, and after exercise is essential for maintaining a well-hydrated, healthy complexion.

Top Products for Managing Exercise-Related Skin Issues

Using targeted products can go a long way in maintaining clear, comfortable skin while exercising.

1. Salicylic Acid Body Wash – Effective for managing acne on the body, salicylic acid cleansers can help reduce breakouts by gently exfoliating and preventing clogged pores.

2. Antifungal Body Powder – Formulated to fight fungal growth, this powder is a great addition for gym-goers who want to keep their skin dry and protected from infections.

3. Anti-Chafing Balm – This balm can be applied to areas prone to chafing, creating a protective barrier to reduce friction and soothe irritated skin.

4. Cooling Aloe Vera Gel – Perfect for post-workout care, aloe vera gel can soothe irritated or rash-prone areas, providing immediate relief.

5. Non-Comedogenic Moisturizer – Choose a lightweight moisturizer that hydrates without clogging pores, especially for facial skin that’s prone to post-workout breakouts.

6. Gentle Cleansing Wipes – For those unable to shower immediately after exercise, keeping a pack of fragrance-free cleansing wipes can help remove sweat and bacteria on the go.

Final Thoughts

Exercise is essential for a healthy body, but it can sometimes lead to skin issues that are uncomfortable and persistent. By understanding why these problems occur and taking proactive steps, you can enjoy the benefits of exercise without compromising your skin’s health. Incorporate the right products and practices into your routine, and you’ll find that exercise and clear, healthy skin can go hand-in-hand.

For more on exercise and skin issues, read: Exercise Etiquette: Good Hygiene


This post contains affiliate links, meaning that I may receive compensation if you make a purchase through these links. As an Amazon Associate, I earn from qualifying purchases. This compensation does not influence the content, or recommendations provided. The opinions expressed are my own, and I strive to provide honest and unbiased information.


4 Powerful Yoga Poses for a Strong Core. A strong core is the foundation of a healthy body. It improves posture, enhances balance, and supports the spine, reducing the risk of injuries. While there are many ways to strengthen your core, yoga stands out as a holistic approach that not only targets your abdominal muscles but also your back, hips, and shoulders.

In this post, we’ll explore 4 powerful yoga poses that are particularly effective for building a strong core. Whether you’re a beginner or an experienced yogi, these poses can be adapted to suit your level and can be a powerful addition to your practice.

1. Plank Pose (Phalakasana)

Why It’s Effective:
The Plank Pose is a full-body exercise, but it’s especially effective for strengthening the core. It engages the abdominals, shoulders, arms, and legs, providing a solid foundation for more advanced poses. It’s also a great way to build endurance and stability.

How to Do It:
1. Begin in a tabletop position with your wrists directly under your shoulders and your knees under your hips.
2. Step your feet back, one at a time, until your body forms a straight line from your head to your heels.
3. Engage your core by pulling your belly button towards your spine, ensuring your hips don’t sag or lift too high.
4. Keep your neck in a neutral position by looking down at the floor.
5. Hold the pose for 30 seconds to a minute, or longer if you can, focusing on maintaining a straight line.

Tips for Beginners:
– If holding a full plank is too challenging, you can modify the pose by lowering your knees to the ground, making sure your body remains in a straight line from head to knees.
– Focus on breathing deeply and evenly to maintain stability.

Advanced Variation:
For a more challenging version, try lifting one leg at a time, holding it in the air for a few seconds. This will increase the intensity and further engage your core muscles.

2. Boat Pose (Navasana)

Why It’s Effective:
The Boat Pose is a quintessential core-strengthening yoga pose that targets the deep abdominal muscles. It also strengthens the hip flexors and lower back, contributing to a balanced and strong core.

How to Do It:
1. Sit on the floor with your knees bent and your feet flat on the ground.
2. Place your hands behind your knees for support as you lean back slightly, keeping your back straight.
3. Lift your feet off the ground so that your shins are parallel to the floor.
4. Extend your arms forward, parallel to the ground, with your palms facing each other.
5. For a deeper challenge, straighten your legs so your body forms a “V” shape.
6. Engage your core and hold the pose for 20 to 30 seconds, gradually increasing the duration as you build strength.

Tips for Beginners:
– If you find it difficult to straighten your legs, keep them bent, focusing on maintaining your balance and engaging your core.
– To reduce strain on your lower back, keep your spine long and your chest lifted.

Advanced Variation:
For an added challenge, try performing the Boat Pose with a twist. While in the pose, twist your torso to the right, bringing your left hand to the outside of your right thigh. Hold for a few breaths, then repeat on the other side.

3. Side Plank Pose (Vasisthasana)

Why It’s Effective:
Side Plank Pose is an excellent exercise for targeting the obliques, the muscles on the sides of your abdomen. It also strengthens the shoulders, arms, and legs, promoting overall stability and balance.

How to Do It:
1. Start in Plank Pose.
2. Shift your weight onto your right hand and the outer edge of your right foot.
3. Stack your left foot on top of your right foot and extend your left arm towards the ceiling.
4. Keep your body in a straight line, engaging your core and squeezing your thighs together.
5. Hold the pose for 20 to 30 seconds, then repeat on the other side.

Tips for Beginners:
– If balancing is difficult, place your top foot on the floor in front of your bottom leg for added stability.
– Make sure your wrist is directly under your shoulder to avoid putting too much strain on your joints.

Advanced Variation:
For an added challenge, lift your top leg and arm, forming a star shape with your body. This will intensify the pose and further engage your core muscles.

4. Dolphin Pose (Ardha Pincha Mayurasana)

Why It’s Effective:
The Dolphin Pose is a powerful pose that targets the core, shoulders, and arms. It’s particularly effective for building shoulder stability while engaging the deep core muscles that support your spine.

How to Do It:
1. Start on your hands and knees with your forearms on the ground, shoulder-width apart, and your elbows directly under your shoulders.
2. Tuck your toes under and lift your hips towards the ceiling, forming an inverted “V” shape with your body.
3. Keep your forearms pressed firmly into the ground and your neck relaxed.
4. Engage your core and press your chest towards your thighs.
5. Hold the pose for 30 seconds to a minute, focusing on your breath and the alignment of your body.

Tips for Beginners:
– If you find it difficult to lift your hips high, try bending your knees slightly while keeping your spine long.
– Focus on drawing your shoulder blades down your back to avoid hunching.

Advanced Variation:
For a more intense core workout, transition from Dolphin Pose to Dolphin Plank Pose. Lower your hips into a straight line from your shoulders to your heels, then lift back into Dolphin Pose. Repeat this movement for several repetitions.

Conclusion

Incorporating these four yoga poses into your regular practice can help you build a strong, stable core, improve your posture, and enhance your overall physical fitness. Whether you’re new to yoga or a seasoned practitioner, these poses offer a variety of modifications and challenges to suit your level.

Remember, consistency is key. Aim to practice these 4 powerful yoga poses regularly, focusing on your breath and maintaining proper form to get the most out of your yoga practice. A strong core isn’t just about aesthetics—it’s about building a solid foundation for a healthy and active life. Namaste!

For a short list on the benefits of Yoga, watch Yoga: Exceptional Fitness Choice.


By Savannah Wells

This post contains affiliate links, meaning that I may receive compensation if you make a purchase through these links. As an Amazon Associate, I earn from qualifying purchases. This compensation does not influence the content, or recommendations provided. The opinions expressed are my own, and I strive to provide honest and unbiased information.

In the dynamic world of fitness, where trends come and go like the seasons, one workout seems to be bouncing into the limelight more frequently: rebounding.

Picture this: you’re bouncing on a mini trampoline, feeling weightless as you soar through the air, all while sculpting your body and boosting your health. It sounds like child’s play, but rebounding is no joke when it comes to its effectiveness as a fitness regimen.

 What is Rebounding?

Photo of a mini trampoline or rebounder.
Rebounding is Low Impact.

Rebounding, simply put, is exercising on a mini trampoline or rebounder. It involves performing various movements such as jumps, twists, kicks, and squats while bouncing up and down. While it may seem like a novel concept, rebounding has been around for decades, initially gaining popularity in the 1980s.

 Why Rebound?

  • Low-Impact, High-Intensity: Unlike running or jumping on hard surfaces, rebounding offers a low-impact workout that is gentle on the joints. The trampoline’s surface absorbs much of the shock, reducing the risk of injury while still providing an intense cardiovascular workout.
  • Full-Body Engagement: Every bounce engages multiple muscle groups, including the legs, core, arms, and even the smaller stabilizing muscles. From simple jumps to more complex movements, rebounding targets various areas of the body, leading to improved strength, flexibility, and coordination.
  • Boosts Lymphatic System: Rebounding is known to stimulate the lymphatic system, which plays a crucial role in removing toxins and waste from the body. The up-and-down motion helps lymph fluid circulate more efficiently, enhancing detoxification and immune function.
  • Enhances Balance and Coordination: Balancing on a trampoline requires coordination and proprioception, the body’s ability to sense its position in space. Regular rebounding sessions can improve balance, stability, and spatial awareness, which are essential for overall physical performance and injury prevention.
  • Fun and Versatile: Perhaps the most significant advantage of rebounding is its sheer enjoyment factor. Bouncing on a trampoline brings out the inner child in everyone, making workouts feel less like a chore and more like playtime. Plus, the variety of exercises you can perform on a rebounder—from basic bounces to dance-inspired routines—ensures that boredom never sets in.

 Getting Started with Rebounding

If you’re intrigued by the idea of rebounding, here are some tips to get started:

  • Invest in Quality Equipment: While rebounders come in various shapes and sizes, opt for one that is sturdy, durable, and equipped with a supportive handle. Look for models with adjustable settings to customize the intensity of your workout, such as the Kanchimi foldable mini rebounder.
  • Start Slow: If you’re new to rebounding, begin with basic bouncing movements to familiarize yourself with the equipment and build your confidence. Gradually incorporate more challenging exercises as you become comfortable.
  • Mix It Up: Keep your rebounding routine exciting by experimenting with different exercises and incorporating props such as resistance bands or small hand weights. Challenge yourself with interval training or follow along with online workouts led by certified instructors.
  • Listen to Your Body: As with any form of exercise, pay attention to how your body feels during and after rebounding sessions. If you experience any pain or discomfort, adjust your movements or seek guidance from a fitness professional.

 Conclusion

In a world inundated with high-intensity workouts and extreme fitness trends, rebounding offers a refreshing alternative that combines fun and effectiveness. Whether you’re looking to shed pounds, tone muscles, or simply add a dose of joy to your fitness routine, bouncing on a trampoline might be just what you need to elevate your health and well-being. So, lace up your sneakers, hop on a rebounder, and let the good times bounce!

For more information on Indoor Fitness, read Indoor Fitness 123

 By Savannah Wells

Running is more than just a physical activity; it’s a journey of self-discovery, discipline, and continuous improvement. Whether you’re a seasoned marathoner or a beginner aiming to complete your first 5K, the path to reaching your next running milestone is paved with intentional habits and practices. In this guide, we’ll explore 7 habits to achieve your running goals. Developing these habits will put you at peak performance.

1. Set SMART Goals

Setting SMART (Specific, Measurable, Achievable, Relevant, and Time-bound) goals is the foundation of any successful running journey. Instead of vague aspirations like “run faster” or “run more,” SMART goals provide clarity and direction.

– Specific: Clearly define your goal. For example, “I want to run a sub-25 minute 5K.”
– Measurable: Track your progress. Use a running app or journal to monitor your pace, distance, and time.
– Achievable: Ensure your goal is realistic given your current fitness level and training time.
– Relevant: Align your goal with your overall running ambitions, whether it’s building endurance or increasing speed.
– Time-bound: Set a deadline. For instance, “I want to achieve this goal within three months.”

By setting SMART goals, you create a clear roadmap for your training, making it easier to stay motivated and focused on your next running milestone.

2. Prioritize Consistency Over Intensity

Consistency is the secret sauce of successful runners. While it’s tempting to push yourself to the limit every run, it’s consistency that truly drives progress. Developing a habit of running regularly—whether it’s three times a week or daily—helps build endurance, strengthen muscles, and improve overall performance.

To maintain consistency:

– Create a Schedule: Plan your runs in advance. Treat them as non-negotiable appointments.
– Start Small: If you’re new to running, begin with shorter distances and gradually increase as your endurance improves.
– Listen to Your Body: It’s important to recognize when you need rest to avoid burnout or injury. Consistent running includes knowing when to take a break.

Remember, it’s better to have a series of good, consistent runs than one extraordinary but exhausting run. Consistency builds the foundation for achieving your long-term running goals.

3. Incorporate Strength Training

Free Side view of unrecognizable female athletes in sportswear and sneakers stretching legs doing exercises on stadium Stock Photo

Running is primarily a cardiovascular activity, but incorporating strength training into your routine can significantly enhance your performance. How? Stronger muscles provide better support to your joints, reduce the risk of injury, and improve your running economy.

– Focus on Core Strength: A strong core stabilizes your body and enhances your running posture, making each stride more efficient.
– Target Key Muscle Groups: Include exercises that strengthen your legs, glutes, and hips, such as squats, lunges, and deadlifts.
– Don’t Forget Upper Body: While running is leg-focused, a strong upper body helps maintain balance and form, especially during long-distance runs.

Adding strength training two to three times a week to your regimen can make a significant difference in reaching your next running milestone, whether it’s increasing speed or building endurance.

4. Optimize Your Nutrition

What you eat plays a crucial role in your running performance. Proper nutrition fuels your runs, aids recovery, and helps you achieve your running goals.

– Balanced Diet: Ensure your diet includes a mix of carbohydrates, proteins, and fats. Carbs are your primary energy source, proteins repair muscles, and fats provide long-term energy.
– Pre-Run Fuel: Eat a small, easily digestible meal or snack about 30 minutes to an hour before your run. Focus on carbohydrates for quick energy.
– Post-Run Recovery: After running, replenish your glycogen stores and repair muscles with a combination of carbs and proteins. A banana with peanut butter or a protein shake is ideal.
– Stay Hydrated: Dehydration can significantly impact your performance. Drink water throughout the day and consider electrolyte drinks during longer runs.

By optimizing your nutrition, you ensure that your body is properly fueled, which is essential for reaching any running milestone.

5. Embrace Rest and Recovery

Rest and recovery are often overlooked but are vital to achieving your running goals. Running puts stress on your body, and without proper recovery, you risk injury, burnout, and stagnation in performance.

– Sleep Well: Aim for 7-9 hours of sleep per night. Sleep is when your body repairs itself and builds muscle.
– Active Recovery: Incorporate light activities such as walking, yoga, or swimming on rest days to keep your body moving without the intensity of a run.
– Listen to Your Body: If you’re feeling overly fatigued or sore, take an extra rest day. It’s better to take one day off than be sidelined for weeks due to injury.

Regular rest days and adequate sleep are crucial components of any training plan, ensuring you stay strong, healthy, and ready to conquer your next running milestone.

6. Mental Training: Build a Strong Mindset

Running is as much a mental challenge as it is a physical one. Developing mental toughness can be the key to pushing through tough runs, overcoming plateaus, and achieving your running goals.

– Positive Visualization: Imagine yourself achieving your goal. Whether it’s crossing the finish line of a race or hitting a new personal best, visualization can boost confidence and motivation.
– Set Mini-Goals: During a tough run, break it down into smaller, more manageable parts. Focus on reaching the next mile marker, then the next.
– Develop a Mantra: A powerful mantra can help push through difficult moments. Simple phrases like “strong and steady” or “one step at a time” can keep you focused and resilient.

Mental training is about preparing your mind for the challenges ahead, ensuring you stay motivated and determined to reach your running milestones.

7. Seek Support and Accountability

Free Group of Men Running on Streets Stock Photo

Running can be a solitary activity but having a support system can make a significant difference in achieving your goals. Whether it’s a running group, a coach, or a friend who shares your passion, accountability and encouragement can keep you on track.

– Join a Running Community: Running clubs, online groups, or even social media communities can provide motivation, advice, and camaraderie.
– Hire a Coach: A running coach can offer personalized training plans, advice, and feedback to help you reach your goals faster.
– Run with a Friend: Having a running buddy can make runs more enjoyable and provide the accountability needed to stick to your training plan.

A support system not only helps you stay committed but also makes the journey to achieving your running goals more enjoyable and rewarding.

Conclusion

Achieving your running goals is a combination of setting clear objectives, maintaining consistent training, optimizing your nutrition, and fostering a strong mindset. By adopting these seven habits, you’ll be well on your way to reaching your next running milestone.  Lace up, stay committed, and watch yourself transform into the runner you aspire to be.


By Savannah Wells

This post contains affiliate links, meaning that I may receive compensation if you make a purchase through these links. As an Amazon Associate, I earn from qualifying purchases. This compensation does not influence the content, or recommendations provided. The opinions expressed are my own, and I strive to provide honest and unbiased information.

Strengthen Your Hip Flexors: 5 Key Exercises

Hip flexors play a crucial role in almost every lower body movement, from walking and running to sitting and standing. Strong hip flexors can improve posture, enhance athletic performance, and reduce the risk of injury. However, many people neglect these muscles, leading to tightness, weakness, and pain. Whether you’re an athlete looking to improve performance or someone aiming to maintain mobility as you age, focusing on your hip flexors is essential.

In this post, we’ll explore the top five exercises to strengthen your hip flexors, including alternatives for those with limited mobility.

1. Standing Hip Flexor March

Photo of a Woman performing a Standing Hip Flexor
Standing Hip Flexor Exercise can be Done Anywhere

The Standing Hip Flexor March is a simple yet effective exercise that can be performed anywhere, making it ideal for those with busy schedules or limited space.

How to Perform:

1. Stand tall with your feet shoulder-width apart and engage your core.
2. Slowly lift one knee toward your chest as high as possible without leaning backward.
3. Hold the position for a moment before lowering your leg back down.
4. Repeat with the other leg.
5. Perform 3 sets of 10-15 repetitions per leg.

Alternative for Limited Mobility:

If standing is difficult, try a seated version. Sit in a chair with your feet flat on the ground. Lift one knee toward your chest, hold, and then lower it back down. This exercise can also be done using resistance bands for added challenge.

2. Lying Leg Raises

Lying Leg Raises target the lower abdominal muscles along with the hip flexors, making it a great dual-purpose exercise.

How to Perform:

1. Lie flat on your back with your legs extended and arms by your sides.
2. Keep your legs straight and lift them toward the ceiling until they are at a 90-degree angle.
3. Slowly lower your legs back down without letting them touch the floor.
4. Perform 3 sets of 12-15 repetitions.

Alternative for Limited Mobility:

For those with limited mobility, try a bent-knee version. Instead of keeping your legs straight, bend your knees and bring them toward your chest, then lower them back down. This reduces the strain on your lower back and hips.

3. Hip Flexor Stretch with Resistance Band

This exercise not only strengthens but also stretches your hip flexors, promoting flexibility and reducing tightness.

How to Perform:

1. Secure a resistance band around a sturdy object and loop the other end around your foot.
2. Lie on your back with your knees bent and feet flat on the floor.
3. Slowly extend the leg with the band, feeling a stretch in your hip flexor.
4. Hold the position for 15-30 seconds, then relax.
5. Perform 3 sets of 10-12 repetitions on each leg.

Alternative for Limited Mobility:

If lying down is uncomfortable, perform this exercise seated. Sit in a chair, secure the band, and extend your leg forward. This position provides a gentler stretch while still engaging the hip flexor muscles.

4. Mountain Climbers

Mountain Climbers are a dynamic exercise that targets the hip flexors while also providing a cardiovascular workout.

How to Perform:

1. Start in a plank position with your hands directly under your shoulders.
2. Quickly bring one knee toward your chest while keeping the other leg extended.
3. Switch legs rapidly, as if you’re “climbing” in place.
4. Continue for 30-60 seconds, focusing on maintaining proper form.
5. Perform 3 sets.

Alternative for Limited Mobility:

For a low-impact version, perform this exercise slowly and controlled, focusing on form rather than speed. Alternatively, try standing mountain climbers by raising your knees toward your chest while standing, reducing the strain on your wrists and lower back.

5. Hip Bridges

Photo of a Woman do Hip Bridges Outside on the lawn
Hip Bridges Provide a Great Lower Body Workout

Hip Bridges not only strengthen the hip flexors but also engage the glutes and lower back, offering a comprehensive lower body workout.

How to Perform:

1. Lie on your back with your knees bent and feet flat on the floor.
2. Place your arms by your sides, palms facing down.
3. Lift your hips toward the ceiling, squeezing your glutes at the top.
4. Hold for a moment before lowering your hips back down.
5. Perform 3 sets of 15-20 repetitions.

Alternative for Limited Mobility:

If you have limited mobility, try a supported bridge. Place a pillow or cushion under your lower back to provide extra support as you lift your hips. You can also reduce the range of motion by lifting your hips only a few inches off the ground.

Incorporating Hip Flexor Exercises into Your Routine

Strengthening your hip flexors is not just about improving one specific area; it’s about enhancing overall mobility and reducing the risk of injury. Whether you’re an athlete or someone looking to maintain functional fitness, these exercises can be tailored to suit your needs.

Tips for Success:

1. Warm-Up: Always warm up before performing hip flexor exercises to reduce the risk of injury. A quick 5–10-minute warm-up can include light cardio, such as walking or cycling, and dynamic stretches.

2. Consistency is Key: Aim to perform these exercises 3-4 times a week for the best results. Gradually increase the intensity or repetitions as your strength improves.

3. Listen to Your Body: If you experience pain or discomfort, stop the exercise and consult with a healthcare professional. It’s important to differentiate between muscle soreness and pain that could indicate an injury.

4. Combine with Stretching: Regularly stretch your hip flexors to maintain flexibility. Tight hip flexors can lead to lower back pain and posture issues, so incorporating stretches alongside strengthening exercises is crucial.

5. Stay Hydrated: Hydration plays a key role in muscle function and recovery. Make sure to drink plenty of water before and after your workouts.

Final Thoughts

Strong hip flexors contribute to better posture, improved athletic performance, and overall functional fitness. By incorporating these exercises into your routine, you can enhance your hip flexor strength and enjoy greater mobility and reduced injury risk. Remember to start slowly, focus on proper form, and modify the exercises as needed to suit your mobility level. Whether you’re a seasoned athlete or just starting your fitness journey, strong hip flexors are essential for maintaining a healthy, active lifestyle.

Another alternative is to make use of exercise videos targeting the hips.

Stay consistent, listen to your body, and you’ll soon notice the benefits of stronger, more flexible hip flexors in your daily life.

For more Exercise Incentive, read: Physical Fitness: Why Important?